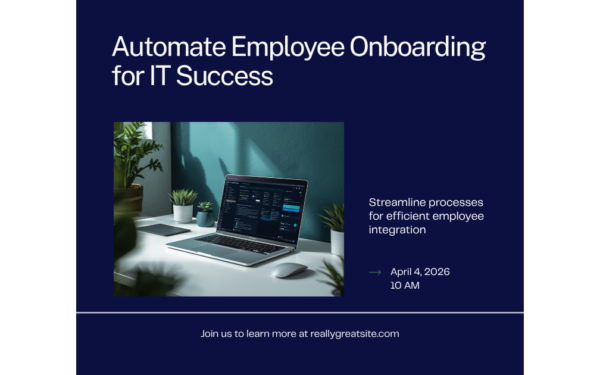
When a new hire starts at a distributed company, one problem stands out above the rest: 39% of remote employees report that their company did not set up their work tools or technology properly. Even worse, 43% say it took over a week just to get basic workstation and tools in place.
What is IT onboarding? IT onboarding is the process of provisioning devices, accounts, software, and access permissions for new employees. For remote teams, it involves pre-configuring devices before they arrive and setting up digital access before day one.
The difference between a smooth first week and a frustrated first month often comes down to a single thing: having a solid IT onboarding checklist before day one. When you get IT provisioning right, you’re not just checking boxes. You’re improving productivity by 15% according to Gartner, and you’re setting the tone for whether that hire feels prepared or lost.
This guide walks you through everything your IT and HR teams need to handle before, during, and after your remote employee’s first day. No generic “onboarding basics.” Just the specific steps that work for distributed teams.
TL;DR: IT Onboarding Essentials
- Ship pre-configured devices 3-5 days before the start date with all OS, security tools, and role-specific software installed
- Set up accounts (email, identity provider, VPN, password manager) before day one and share credentials securely
- Implement multi-factor authentication across all critical systems before the new hire touches anything
- Use zero-touch provisioning (Windows Autopilot or Apple ADE) to automate device setup and reduce IT burden
- Create role-specific access requirements and review permissions with security team before day one
- Send onboarding kits via carrier that provides tracking and liability coverage
- Conduct device security briefing during first week covering VPN, encryption, and company policies
- Automate repetitive setup tasks using your existing ITSM tool or dedicated onboarding software
Research Before You Start: Understanding Your Remote Onboarding Gap
Before you build your IT onboarding checklist, understand where your company stands today. Spend an hour interviewing recent hires about their first week. Ask them three questions:
“Did your equipment arrive before your start date?” “How long before you could access all the systems you needed?” “What took the longest to set up?”
Their answers matter because 63% of remote employees said onboarding didn’t provide what they needed to succeed. That’s not a training problem. That’s a systems problem.
Remote-onboarded employees report 63% satisfaction with their preparation for the role, compared to higher satisfaction rates for in-person hires. The gap exists because you can’t troubleshoot a laptop crash with someone sitting next to you when they’re 2,000 miles away.
This checklist fixes that by shifting work upstream. Instead of reacting to problems, you’ll provision everything in advance.
1. Plan Your Device Strategy (Before Hiring Closes)
Before you write an offer letter, your IT team needs to know which devices new hires receive. This decision shapes everything else.
You have three paths:
Owned devices (company purchases and ships): Higher upfront cost, complete control over security, faster time-to-productivity. Best for security-sensitive roles.
BYOD with provisioning software (employee uses their own device but you manage it): Lower hardware costs, employee preference in surveys, requires strong mobile device management (MDM).
Hybrid (company device for work, personal device for email): Balances cost and control, common at larger organizations.
For remote teams, owned devices typically win because shipping is predictable and you control the hardware. 71% of managed service providers added device provisioning to their service offerings since 2023, which tells you this is now table stakes.
Pick 2-3 approved laptop models per role. Standardization saves IT support time. A designer might get a MacBook Pro with 32GB RAM. A project coordinator might get a ThinkPad with 16GB. Document which role gets which device and why.
Checklist item: Define device strategy by role, get executive sign-off, and share with hiring team.
2. Set Up Identity and Access Before Day One
This is where things get non-negotiable. A new hire should never arrive to discover you haven’t created their email address.
During the offer acceptance window, your IT team should immediately:
- Create email and identity provider account (Okta, Entra ID, JumpCloud)
- Generate temporary passwords and store them in your secure password manager
- Create VPN user account and test connection
- Pre-stage user in your HRIS system
- Create account in 1-3 critical systems depending on role (Slack, GitHub, Jira, Salesforce, etc.)
This happens while your offer letter is still warm. Not during the week of.
Set up a secure handoff process. Don’t email passwords. Use a password manager with vault sharing or an encrypted delivery system like 1Password. If you’re using Google Workspace, set up a shared Google Drive folder where the new hire can securely receive their first login. Delete it after they acknowledge access.
One company we researched uses this flow: IT creates accounts on day of offer acceptance, stores credentials in a vault accessible only to the manager, then the manager manually shares the first password with the employee on day one via a verification call. By the time the laptop arrives, the hire is already logging in.
Checklist item: Email, VPN, identity provider, and password manager accounts created three business days before start date. Credentials stored securely and ready for handoff.
3. Build Your Pre-Configured Device Delivery System
Shipping a blank laptop teaches your new hire that IT doesn’t have their back. Shipping a device that’s ready to work teaches the opposite.
Zero-touch provisioning exists for exactly this reason. Here’s how it works:
For Windows machines: Use Microsoft Autopilot. IT pre-registers the device with Microsoft, configures cloud-based policies, and assigns applications. When your new hire powers on the device, they enter their corporate credentials, and the system automatically downloads policies, installs software, and applies security settings. No IT touchpoint. No manual configuration.
For Mac machines: Apple’s Automated Device Enrollment (ADE) works similarly. Devices ship to your office, get enrolled in ADE, and then ship to the remote employee. When they power on, they log in with their corporate credentials and the device configures itself.
If you’re not ready for zero-touch provisioning yet, use this approach: have your IT team or a partner pre-install the OS, apply security policies, install required applications, set automatic screen locks, and enable full-disk encryption before the device ships. When it arrives at the employee’s home, they unbox it, log in, and start working.
Research shows 87% of organizations using onboarding automation report faster time-to-productivity for new hires. You’re not just saving IT effort, you’re buying your new hire’s first-week productivity back.
Shipping logistics: Use a carrier that provides signature on delivery and tracking at every step. For high-security roles, consider having the device shipped to the employee’s address with a phone call to confirm arrival. Include a shipping tracking number in the onboarding email so they know it’s coming.
Checklist item: Device enrolled in Autopilot or ADE, all OS and role-specific software pre-installed, security policies applied, shipped with tracking 3-5 business days before start date.
4. Security Foundation: Multi-Factor Authentication and Encryption
This is not optional. A compromised remote device is a disaster.
Before a new hire logs into anything, set this up:
Multi-factor authentication (MFA): Require it for email, identity provider, and any system containing company data. Use authenticator apps (Microsoft Authenticator, Google Authenticator) or hardware security keys. SMS-based MFA is weaker but acceptable if it’s your only option. Enroll them before day one so they’re not locked out on day one.
Full-disk encryption: Windows (BitLocker) or Mac (FileVault) should be enabled during pre-configuration. If a device is lost or stolen, the drive is useless without the decryption key.
VPN requirement: Remote devices should connect to your VPN before accessing any internal resources. This encrypts all traffic and isolates the device from your corporate network. Test the connection during pre-configuration to catch driver issues before the device ships.
Endpoint detection and response (EDR): CrowdStrike, SentinelOne, or Microsoft Defender should be running on every device. This isn’t just antivirus. It’s threat detection and response, which you need in a distributed environment.
During week one, conduct a 15-minute security briefing. Cover VPN usage, password hygiene, reporting suspected phishing, and what to do if their device is lost or stolen. Document this as a signed acknowledgment for compliance purposes.
One company we researched requires new hires to complete a 5-minute security video and pass a 10-question quiz before they get access to customer data. Not because everyone fails, but because it moves security from abstract policy to concrete requirement.
Checklist item: MFA enrolled for all critical systems, full-disk encryption enabled, VPN tested and working, EDR agent installed and configured, security briefing scheduled for day three.
5. Create Role-Specific Access and Permissions
Generic access is a security liability. Each role needs specific permissions, no more.
Work with each department head to define access requirements. Don’t ask “what do you need.” Ask “what’s the minimal access to do the job.”
An engineer might need:
- GitHub access (developer tier)
- Jira access (project level)
- AWS development account access (EC2, S3)
- Slack (engineering channel)
- Google Workspace
A marketer might need:
- HubSpot (admin or user tier)
- Figma (design files)
- Google Workspace
- Slack (marketing channel)
- Zoom (recording permission)
Document this access map for every role. Store it in a shared spreadsheet with these columns: Role, System, Access Level, Expiration (if temporary), Reviewer.
Before a new hire starts, have your security or IT manager review the access list. This is your chance to catch over-provisioning. “Does the intern really need admin access to production?” Usually the answer is no.
Add a quarterly access review to your calendar. For each system, you’ll review who has access and confirm it’s still appropriate. This is where you catch the engineer who left six months ago and still has database access.
Checklist item: Role-specific access defined and documented, reviewed by IT and security, implemented before day one, added to quarterly review schedule.
6. Build Out Communication and Collaboration Platforms
Remote employees live in Slack, email, and video. Get these right first.
Email: Test that mail flow is working. Send a welcome email before day one. Include your support contact information, links to IT documentation, and the IT support phone number. Some companies send it from the CEO. Some send it from the hiring manager. Either way, make sure a human message hits their inbox on day one, not just system notifications.
Slack or Teams: Create a #new-hires channel where you post daily check-ins and links to resources. Add the employee to department-specific channels. Make sure they can find you. Slack has a feature where you can assign a Slack buddy. Use it. For remote employees, this human connection matters.
Zoom or video conferencing: Test the employee’s ability to join a call. Run a quick test call on day one to confirm camera, mic, and speaker work. Nothing derails remote onboarding faster than “I can’t hear you” in your first meeting.
Password manager: If your team uses one (LastPass, 1Password, Dashlane), onboard them there too. Store shared logins for common systems so they don’t have to ask for credentials multiple times.
Some teams create a “day one digital kit” in Slack. It’s a pinned message with links to: IT support, password manager, VPN instructions, time tracking (if used), benefits portal, team wiki, and org structure. It sounds simple, but it’s the difference between a new hire Googling for things and a new hire finding answers in 20 seconds.
Checklist item: Email tested and working, Slack/Teams account created with appropriate channel membership, password manager access granted, Zoom test call scheduled for day one.
7. Prepare complete Onboarding Documentation
Remote employees can’t poke their head over a desk and ask a question. They need documentation that anticipates their needs.
Create a one-pager per role. Seriously, just one page. It should include:
- First-week schedule (meetings, check-ins, deliverables)
- IT systems they’ll use and how to access them
- Who to contact if [problem] happens
- Links to IT wiki pages specific to their role
- Slack channels they should join
Store this in a shared drive they can access immediately. Put the link in the welcome email.
Beyond that, build out a role-specific IT setup guide. If you’re onboarding engineers, document:
- How to set up your local development environment
- How to access the GitHub repo
- How to run the test suite
- How to deploy to staging
- Who code reviews pull requests
This document is gold because it’s not generic IT stuff. It’s specific to their job. When they hit a snag, they can reference the doc instead of bothering someone.
Some teams automate this with onboarding platforms like GroWrk or ManageEngine. These tools let you build templates, assign tasks to new hires, and track completion. New hire logs in, sees their checklist, works through it. Some tasks trigger automatically (like sending an email to IT to provision a service).
If you use automation, the document still matters. Automation handles the structure. Documentation handles the “why.”
Checklist item: One-pager created for the specific role, role-specific IT setup guide documented, stored in accessible shared drive, link included in welcome email.
8. Plan Your First-Week Touch Points
Remote onboarding doesn’t end at day one. Week one is where most problems surface.
Schedule these check-ins:
Day one, 30 minutes: Manager check-in. “Device arrive? Can you log in? Any blockers?”
Day one afternoon: IT support check-in. Same questions. Escalate any blockers immediately.
Day two: Let them work, but stay available. Blockers often surface in the first afternoon after they’ve tried things.
Day three: Security briefing (15 minutes, as mentioned above).
Day four: Department-wide “meet the team” call. For remote companies, this is the only time they meet their team mates synchronously. Make it count.
Day five: Manager 1-on-1. Review week one, discuss next priorities, ask what they’re struggling with.
Some teams schedule a “tech checkout” call mid-week where they work through any remaining setup issues. This is different from a status check. It’s specifically about technology. “Do you have access to all systems? Is anything running slow? Do you need any updates to your device?”
Use a shared checklist for these calls. One team we researched uses this format:
- Device and hardware working: Yes/No
- All software installed and running: Yes/No
- VPN connecting reliably: Yes/No
- All accounts created: Yes/No
- Access to all needed systems: Yes/No
- Blockers and ETA to resolve: [list]
Share this with the employee after each call. It makes the state of their setup visible and takes the ambiguity out of “when will this be fixed?”
Checklist item: Manager check-in scheduled for day one morning, IT support check-in scheduled for day one afternoon, security briefing scheduled for day three, tech checkout call scheduled for day four.
9. Create a Device Shipping and Arrival Process
Logistics matter more than you’d think.
Two days before a device ships, send the employee:
- A notification that it’s shipping
- The carrier and tracking number
- An expected delivery date
- Instructions on what to do when it arrives
- Your support contact if anything goes wrong
When they receive it, they should:
- Verify the box is undamaged
- Power on the device and confirm it starts
- Attempt to log in with their credentials
- Call or message your IT support if anything fails
If the device fails to power on or shows errors, you need a replacement process. Some companies keep a spare device in inventory. Some use a partner (managed service provider) to handle replacements overnight.
For international employees, shipping complexity increases. Factor in 5-7 business days, customs delays, and the need for a local support contact in their country.
One company we researched requires employees to sign a device agreement before the device ships. This document covers:
- Device is company property
- Device must be used only for work
- Device must have full-disk encryption enabled at all times
- Device must connect to VPN before accessing company networks
- Lost or stolen devices must be reported within 2 hours
- Devices are wiped when employment ends
Make sure your employee handbook includes this. Device agreements are boring until something goes wrong, and then they’re crucial.
Checklist item: Shipping notification sent 2 days before device ships, tracking number provided, arrival instructions included, employee signs device agreement before shipping.
10. Prepare Your IT Support for Onboarding Volume
Your IT team will see an influx of questions during week one. Prepare them.
Create a quick reference guide for common onboarding issues:
“I can’t log in”: Check if identity provider is working. Confirm username spelling. Reset password via password manager. If all else fails, open IT ticket.
“My VPN won’t connect”: Confirm VPN software is installed. Restart the device. Check internet connection. If not resolved, IT troubleshoots via screen share.
“I can’t access [system]”: Confirm user account was created. Check that permissions were assigned. Confirm MFA is enrolled if required. If not resolved, escalate to system owner.
“My device is slow”: Confirm background updates aren’t running. Check CPU and RAM usage. Confirm disk isn’t full. If not resolved, collect performance logs.
Create a Slack channel or email group for IT support during onboarding. Assign one person as the primary support contact for each new hire. That person is responsible for responding within 30 minutes during the employee’s first week.
Some teams use a ticketing system like Jira or Zendesk specifically for onboarding. Tickets are tagged with “onboarding” and automatically assigned to the IT team. This creates accountability and a paper trail if something goes wrong.
Checklist item: IT support process documented, one primary contact assigned per new hire, quick reference guide created, support channel or email set up.
11. Automate Repetitive Tasks
After you’ve done onboarding five times manually, you’ve wasted two days of IT time.
Automation saves that time.
Tools like ManageEngine, GroWrk, and Rippling can handle:
- Creating user accounts across multiple systems in parallel
- Sending templated emails at each onboarding milestone
- Assigning and tracking onboarding tasks
- Provisioning devices with pre-configured software
- Scheduling check-in meetings
- Collecting feedback surveys
- Offboarding (removing access, wiping devices)
The ROI is fastest if you hire more than three people per quarter. If you hire infrequently, the setup cost might not make sense yet.
If you don’t have a tool, use what you have. Create a Google Form for IT setup checklist. Every time a new hire starts, you fill it out and it populates a spreadsheet. That spreadsheet triggers automated email reminders for each task. Not as elegant as dedicated software, but it works.
A step up: use Zapier or Make to connect your HR system (BambooHR, Workday) to your IT systems. When HR marks someone as “hired,” a Zapier workflow automatically creates email, identity provider account, and Slack account in parallel. You still need to review and tweak, but 70% of the work is automated.
Checklist item: Identify 3-5 most time-consuming onboarding tasks. Evaluate whether automation tool or Zapier integration is worthwhile. Implement if ROI is clear.
FAQ: Common IT Onboarding Questions
Q: How long before a hire starts should we order their device?
Order the device the day the offer is accepted, not the start date. Shipping takes 3-5 business days. Pre-configuration takes 2-3 days. You want the device to arrive 3-5 days before their start date, which gives you a buffer if something goes wrong.
Q: What if an employee wants to use their own laptop instead of a company device?
For remote companies, this is a negotiable item. Some allow it, some don’t. If you do allow it, you must install MDM (mobile device management) software before they use any company networks. This lets you enforce encryption, remote lock, and device wiping if needed. The device must meet your security standards: current OS, full-disk encryption, antivirus, VPN client.
Q: What do we do with devices when employees leave?
Have a clear offboarding process: week before employee’s last day, disable all accounts and VPN access. On the last day, remove all company data from the device. After the employee leaves, reimage the device for the next hire or recycle it according to data handling policy. For sensitive devices (those with client data), physically destroy the hard drive or use a secure wiping service.
Q: How often should we update our IT onboarding checklist?
Review it quarterly or after every hire, whichever is more frequent. Ask new hires what went wrong and what surprised them. Update the checklist based on their feedback. The first version is 70% right. Version four is 95% right.
Q: Is there a standard time to get a remote employee fully productive?
Gartner’s research shows that employees with a strong onboarding experience are 15% more productive in their first month, and reach full productivity 1-2 months faster than those without. For a typical knowledge worker, you should expect 30% productivity in week one, 60% by end of week three, and 80% by end of week eight. Technical roles might take longer depending on how complex your systems are.
Automate Employee Onboarding IT Setup
MDM Solutions for Remote Teams
HR Technology Stack for Remote Teams
Key Takeaways
A strong IT onboarding checklist won’t prevent every problem, but it catches 80% of them before they become obstacles.
The biggest win comes from shifting work upstream. Instead of troubleshooting during week one, you prepare during the offer stage. Device arrives pre-configured. Accounts exist before day one. Access is reviewed in advance.
This approach costs money upfront (faster shipping, zero-touch provisioning setup, automation tools). It saves money downstream (less IT support load, faster time-to-productivity, fewer security incidents).
Start with the non-negotiables: device pre-configuration, identity and access setup, and MFA. Get those right. Then layer in the nice-to-haves: documentation, automation, dedicated support contact.
For distributed companies, this is where retention starts. A hire who spends day one confused and unable to work has already decided your company is disorganized. A hire who spends day one productive and supported believes you’re ready for remote work.
Make your onboarding checklist worth that belief.